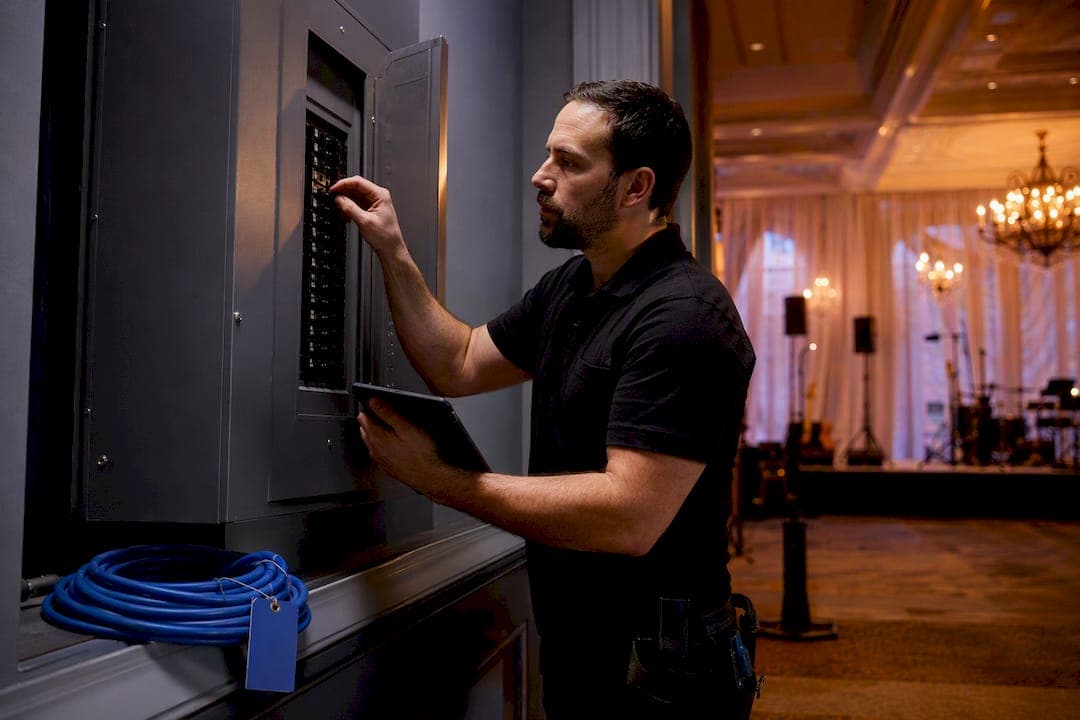
At minimum, a wedding band needs two dedicated 20A/120V circuits within 25 feet of the stage, GFCI protection for any outdoor setup, and a generator rated around 6,000 watts if there's no wall power at all. Every extension cord run should use 12 or 14 AWG cable, chained no more than two 50 foot lengths deep. Send the venue that spec sheet today, then use the calculation below to confirm your band's actual gear matches it.
TL;DR:
- Most full bands require two dedicated 20A/120V circuits within 25 feet of the stage, with GFCI protection required for outdoor setups.
- Use 12 AWG extension cords chained no more than two 50-foot lengths to prevent voltage drop and overheating.
- Calculate power needs by listing device wattages, converting to amps, and keeping continuous draw under 80 percent of circuit capacity.
- Outdoor and outdoor-event power relies on a 6,000W generator with proper placement, outdoor-rated cable, and GFCI protection to ensure safety and reliability.
- Proper planning, including a detailed tech rider and site walk-through, helps prevent mid-set power failures caused by overloads or missequenced gear startup.
Table of Contents
- What Are the Minimum Wedding Band Power Requirements?
- How Do You Calculate Your Band's Power Needs?
- Circuits, Breakers, and What to Ask the Venue Electrician
- Outdoor Power and Generators: Sizing, Placement, and Safety
- Preventing Mid-Set Power Failures
- Building the Tech Rider, Stage Plot, and Timeline
- Venue Walk-Through: What to Check On Site
- Managing Sound Limiters and Venue Decibel Caps
- Surge Protection and Power Conditioning Worth Bringing
- Coordinating With Venue Electricians and Power Policies
- A Musician's Note on Power Mishaps and Reliable Fixes
- How Alexlevinmusic Handles Power and Tech Logistics
- Sources
What Are the Minimum Wedding Band Power Requirements?
Hand your venue coordinator this before the contract gets signed, not the week of the event.
Most professional bands ask for two dedicated 20A/120V circuits within 25 feet of the stage, and that request shows up in booking riders for a reason: it separates band power from everything else pulling current in the building. Smaller acoustic setups can sometimes get by on two independent 15A circuits, but a full band with a PA, monitors, and stage lighting wants the 20A headroom. Either way, the circuits should never share a breaker with catering equipment, uplighting, or a DJ booth. Kitchens spike hard when ovens and warmers cycle on, and that spike is exactly what trips a shared circuit mid toast.
Extension cords matter more than people expect. 12 AWG cable is the safer choice for anything over 50 feet; 14 AWG works for shorter runs but loses voltage faster over distance. A good rule of thumb: never chain more than two 50 foot cords together, since every connection point adds resistance and heat.
| Setup type | Circuits needed | Cord gauge | Notes |
|---|---|---|---|
| Solo or duo acoustic | 1–2 × 15A/120V | 14 AWG | Fine for short runs under 50 ft |
| 4–6 piece band | 2 × 20A/120V | 12 AWG preferred | Standard dedicated circuit request |
| Off-grid outdoor | 6,000W generator, 2×20A outlets | 12 AWG, outdoor rated | Keep generator within 25 ft of stage |
For anything without a wall outlet nearby, a generator delivering several thousand watts with two 20A duplex outlets covers most small to mid-size bands, according to Murray Hill Talent's electrical requirements guide.
How Do You Calculate Your Band's Power Needs?
The math is simpler than it looks, and it takes about ten minutes with a clipboard and your gear's spec plates.
- List every device and its rating. Walk the stage plot and write down the wattage or amperage printed on each amp, powered speaker, mixer, and lighting unit. If a device only lists watts, you'll convert it next.
- Convert watts to amps. At standard 120V service, Amps = Watts ÷ 120. A 1,200 watt powered subwoofer draws 10 amps. Add up every device on a given circuit to get total amp draw.
- Account for gear without a mains rating. Sound On Sound's stage power guide recommends multiplying the audio output rating by roughly 1.4 when a manufacturer doesn't publish actual mains consumption, since amplifiers pull more from the wall than they push out as sound.
- Keep continuous draw under 80% of circuit capacity. A standard U.S. wall outlet on a 15A/120V circuit has a theoretical ceiling of 1,800 watts, but IEMRIG's rack power planning guide puts the safe continuous budget at around 1,440 watts, leaving headroom for startup surges.
Pro Tip: A four-piece band running two guitar amps, a keyboard, and a modest PA typically lands well under 15 amps total. The problem is rarely the band's own gear. It's the caterer's warming trays sharing the same breaker.
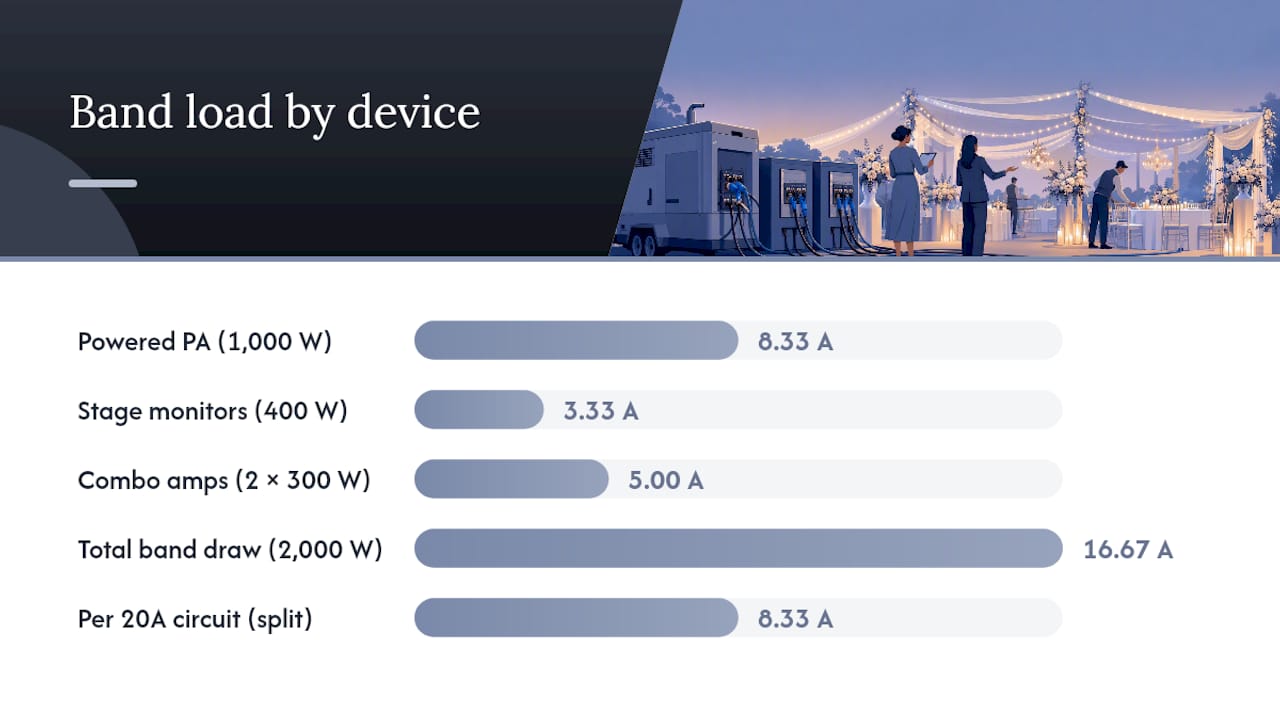
Here's a worked example: a 4-piece band with a 1,000W powered PA, 400W of stage monitors, and two 300W combo amps totals 2,000 watts, or about 16.7 amps at 120V. Split across two 20A circuits, each carries roughly 8 amps continuous, well inside the safe zone even with peak transients factored in.
Circuits, Breakers, and What to Ask the Venue Electrician
Before load-in day, someone needs to actually look at the breaker panel, not just assume it's fine because the room has outlets.
Open the panel door and check whether breakers are labeled and whether the building uses modern circuit breakers or older screw-in fuses. Fuses aren't necessarily unsafe, but they're harder to reset mid-event if something trips, and older buildings sometimes mix fuse boxes with newer subpanels in ways that create confusing, undocumented circuits.
Shared loads cause more mid-set outages than any single piece of band gear. A lighting dimmer rack on the same circuit as your monitor wedges, or a chafing dish warmer sharing a line with your keyboard rig, is a recipe for a breaker trip during the first dance. Ask the venue for:
- A copy of the electrical panel layout or clear photos of labeled breakers.
- Confirmation of at least one spare dedicated circuit beyond what catering and lighting use.
- The name and phone number of an on-call electrician, especially for older properties or historic venues.
For distribution, a compact multiway power distro lets the band split one dedicated circuit safely across multiple amps and pedalboards without daisy-chaining cheap power strips. A power conditioner filters electrical noise from dimmers and motors nearby, though it's worth knowing a conditioner doesn't provide any backup power if the circuit fails. That's a job for a battery backup or UPS, which is worth considering for keyboard players and anyone running in-ear monitor systems where a dropout mid-song is more than a minor annoyance.
Outdoor Power and Generators: Sizing, Placement, and Safety
Tents and gardens change the power equation entirely, and this is where most preventable failures happen.
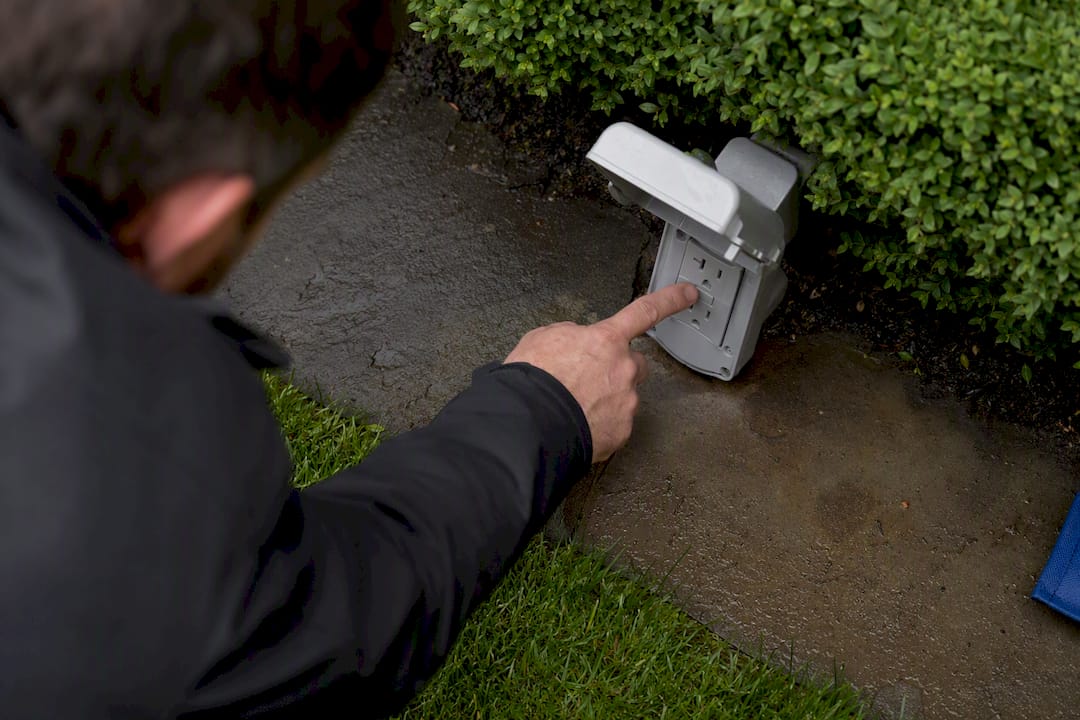
Any outdoor circuit needs GFCI (or RCD) protection as a hard requirement, not a nice-to-have. Ground fault circuit interrupters cut power the instant they detect a current leak, which matters enormously on wet grass with amplifiers plugged in. If the venue's outdoor outlets aren't GFCI protected, bring a plug-in GFCI adapter or ask the venue to supply one before you plug in anything.
Generator sizing follows the same math as indoor circuits, just with more margin. A 6,000 watt unit with two 20A duplex outlets covers a typical small band comfortably, per Murray Hill Talent's electrical requirements guide, though bands running larger active PA systems or full horn sections should scale up based on their summed wattage plus headroom.
A few placement rules keep things both safe and quiet:
- Position the generator 20 to 30 feet from the stage to cut noise bleed into ceremony audio and keep exhaust away from guests.
- Run outdoor-rated, heavy-gauge cable from generator to stage, and keep that run under 25 feet where possible to avoid voltage drop.
- For short acoustic sets or cocktail-hour duos, a battery-powered station is quieter and cleaner than a fuel generator, though EcoFlow's guide to powering outdoor gigs notes that generators still win for longer sets or larger rigs needing sustained high wattage.
Weather protection matters too. Cover any outdoor distro box or generator connection point, and never run cable through standing water.
Preventing Mid-Set Power Failures
Most tripped breakers happen for one of two reasons: someone underestimated peak draw, or someone powered things up in the wrong order.
Startup surges are the real culprit, not steady-state playing volume. An amplifier or powered speaker can pull two or three times its running wattage for a fraction of a second at power on. That's why the math isn't just "will this circuit handle the band playing," it's "will this circuit handle everything switching on at once." Size for that peak, and keep continuous draw under 80% of rated capacity with 20 to 30% headroom built in.
Sequencing prevents most of these trips outright:
- Power up signal chain gear first (mixers, instruments, effects), then bring up power amps and powered speakers last.
- Power down in reverse: amps and mains off first, signal gear last.
- Test any GFCI or RCD protection before doors open by pressing the test button, and bring a plug-in RCD as backup if you're unsure about venue protection.
- Route and tape down every cable run, especially across walkways and near the dance floor.
Pro Tip: Never disconnect a ground/earth pin to fix a hum problem. It's a common shortcut and it turns a minor annoyance into an actual shock hazard.
Building the Tech Rider, Stage Plot, and Timeline
A tech rider isn't paperwork for its own sake. It's the single document that keeps a venue's electrician, the caterer, and the band from stepping on each other's power needs.
- State exact circuit requirements: count, amperage, outlet type, and maximum acceptable distance from the stage.
- List distro and conditioning gear the band brings versus what the venue must supply, including any monitoring or in-ear system power needs.
- Attach a stage plot and input list naming each microphone, DI box, and monitor mix so the venue's sound tech (if there is one) isn't guessing during load-in.
- Set the timeline: confirmed load-in time, a stage and line check, and a soundcheck window of about an hour or so completed before guests arrive.
Bands that show up with a clear rider and stage plot get their gear working faster, largely because the venue's crew isn't improvising wiring decisions on the fly, a point echoed in The Hitmen Trio's technical requirements planner. If you're comparing how a live band's technical footprint differs from a DJ setup, that's worth reviewing separately, since the power and space needs shift meaningfully between the two.
Venue Walk-Through: What to Check On Site
A site visit two or three weeks before the event catches problems an email exchange never will.
Bring a phone flashlight and check the breaker panel directly: confirm labels match reality, note the amperage stamped on each breaker, and press the GFCI test button on any outdoor outlets to confirm they actually trip. Measure or pace off the distance from the intended power source to the stage location. Anything beyond 25 feet means you're planning cord runs, not just plugging in.
Note anything sharing a panel with the band's intended circuits, particularly kitchen equipment or dimmer racks. If the venue allows it, plug in a small load and confirm the circuit holds without flickering nearby lights. Ask for a labeled photo of the panel if you can't get a technician on-site that day. This single checklist step resolves more day-of surprises than any other part of planning, and it pairs well with a broader venue sound and power walk-through checklist.
Managing Sound Limiters and Venue Decibel Caps
Plenty of venues, especially historic properties, tented estates, and residential neighborhoods, install a sound limiter that cuts power to the stage circuits if decibel levels cross a preset threshold. This isn't a power supply issue in the traditional sense, but it behaves like one: cross the limit, and the band loses power mid-song exactly like a tripped breaker.
Ask the venue directly whether a limiter is installed and what the dB threshold is, measured at what distance from the source. Some venues cap at 85 dB, others allow up to 95 dB, and the measurement point (front of house versus at the mixing board) changes what's actually achievable on stage. Get this number during the walk-through, not from a chatty ask on-site the day of the wedding.
Bands manage limiters by controlling stage volume at the source rather than fighting the limiter after it trips. That means favoring smaller, well-placed monitors over blasting wedges, using in-ear monitoring where possible, and keeping drum shells and cymbals appropriately sized for the room. A skilled sound engineer can run a full band at a wedding-appropriate volume that stays under most residential limiter thresholds without sacrificing energy on the dance floor. If the limiter cuts power anyway, the fix isn't more volume. It's confirming the threshold ahead of time and building the set's dynamics around it.
Surge Protection and Power Conditioning Worth Bringing
Electrical noise and voltage spikes are the quiet cause of a surprising number of gear failures that never look like a power problem on the surface.
A basic surge protector absorbs voltage spikes from things like HVAC systems or elevators cycling on the same building service, protecting amplifiers and digital mixers from a shortened lifespan. A power conditioner goes further, filtering out the electrical noise that dimmer packs and motors introduce onto a shared line. That noise is often what causes the persistent hum some bands assume is a grounding issue.
It's worth being precise about what a conditioner actually does: it cleans power, it does not store or back it up. For that, a battery backup or small UPS unit matters most for gear that can't tolerate even a half-second dropout, keyboards mid-song and in-ear monitor transmitters being the obvious examples. A brief power blip that a guitar amp shrugs off can silence a singer's in-ears completely.
Budget-wise, a rack-mounted conditioner with surge protection built in is a reasonable standard for any band running digital mixing gear, and it's cheap insurance against a $2,000 mixer getting fried by a bad spike from an aging building's wiring.
Coordinating With Venue Electricians and Power Policies
The single best predictor of a smooth power setup isn't the gear. It's whether someone talked to the venue's electrical contact before the event week.
Reach out early and ask directly whether the venue has an on-call electrician, what their policy is on outside distro equipment, and whether there's a generator on standby for outdoor ceremonies. Some venues have strict rules about running cable across guest walkways or require all outdoor power to route through venue-owned distribution boxes rather than a band's own gear. Get that in writing before load-in day, not as a surprise from a venue manager an hour before doors.
If the venue caters frequently to live music, ask what other bands have needed and whether any recurring issues have come up, like a particular breaker that trips under load or an outlet that's known to be unreliable. Coordinating with an event planning partner who already knows the venue's quirks, like the private events team at Unveiled New York, can also surface details a first-time walk-through might miss. A ten-minute call with the venue's electrical contact two weeks out solves problems that would otherwise surface in front of 150 guests.
A Musician's Note on Power Mishaps and Reliable Fixes
I've watched a breaker trip mid first dance because a warming tray on the same circuit as our keyboard rig kicked on at the wrong second. It's avoidable, and it's why we don't show up without three things: a labeled distro box, heavy-gauge spare cords, and a plug-in RCD we bring regardless of what the venue claims about its outlets. Every one of those has saved a set at some point. Proactive planning, not better gear, is what actually prevents most mid-set failures.
— Alex
How Alexlevinmusic Handles Power and Tech Logistics
A dedicated music service can remove the power-planning headache entirely by supplying a detailed tech rider with your booking, one that spells out exact circuit counts, outlet placement, and generator specs so you're never guessing what to tell your venue. Coordination directly with venue staff and on-call electricians ahead of the event, as well as bringing labeled distro gear and spare heavy-gauge cable to every load-in, helps ensure smooth setup as standard practice.

That coordination is part of what's covered in Alexlevinmusic's booking-to-encore production process, which walks through exactly how technical logistics get handled from first contact through the final song. If you're planning a wedding and want the electrical side settled without a dozen back-and-forth emails with your venue, request the tech rider and book a site consult through Alexlevinmusic's live performance page.
Sources
- Power & electrical safety on stage — Sound On Sound
- Rack power planning: 15A circuits, conditioners and UPS — IEMRIG
- Power your band gear for outdoor rehearsals and gigs — EcoFlow